
Move website to new host is always a big duty. If you do any mistake you can lose your valuable data, traffic, clients, even your entire website. Due to migrating your site can be down for a very long time.
Besides you can also lose your search engine ranking too. In short, without proper steps, you can suffer from huge losses due to move website to new host.
To do things safely I am here with this guide, where I am going to show you ‘How to Move website to new host safely.
Afterward, you will be able to move website to new host by yourself. Let’s begin then.
How To Move Website To New Host
Take Full Backup Of Your Website
Before you start to move website to new host you should take a proper backup of your website. You can use any of the plugins or services to take a full backup, then you can step forward to move website to new host.
Taking backup will take a few minutes according to your website’s size. But you get protection in time of need when something goes wrong.
Add Domain Name To Your New Host
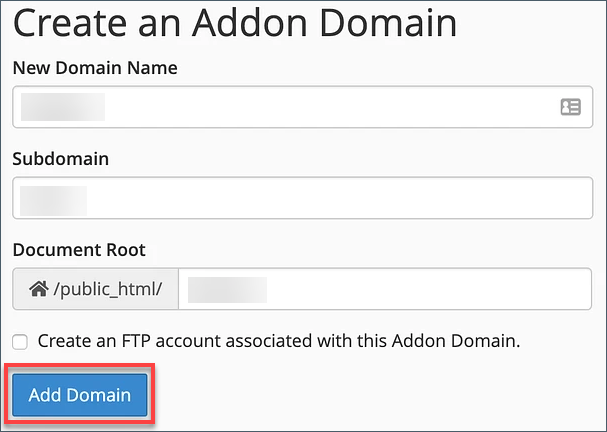
At first, you need to sign up for your new host and add your site. If you own only one website then you might have probably entered your domain name upon the sign-up process of your host. However, if you own multiple sites then you might have to create an Addon Domain.
cPanel calls these additional domain names. If your host doesn’t use cPanel then it might be called with a different name.
Move Files Of Your Website
Now you have to move all of your files to your new host. To move files easily download and install the Duplicator plugin from the WordPress plugins directory to your website that you want to move.
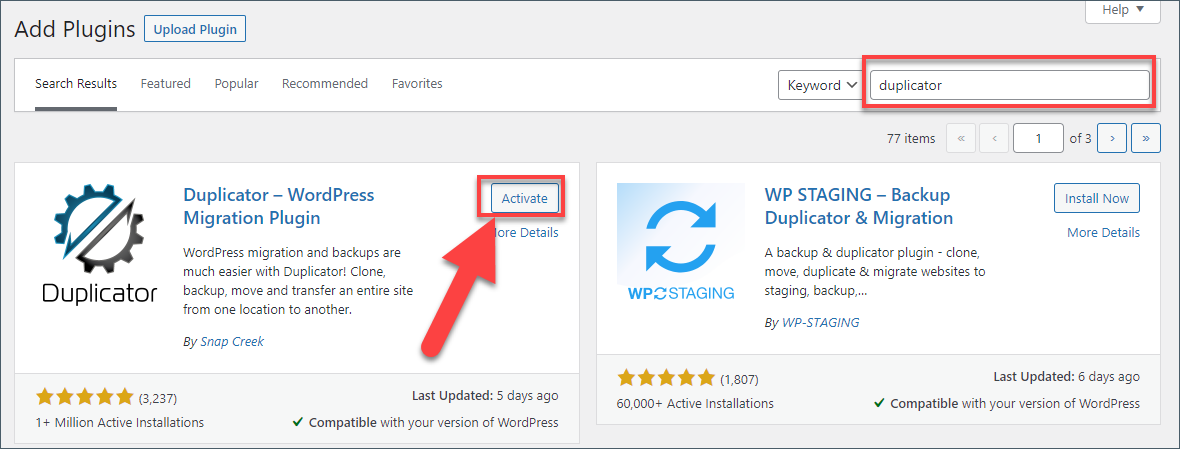
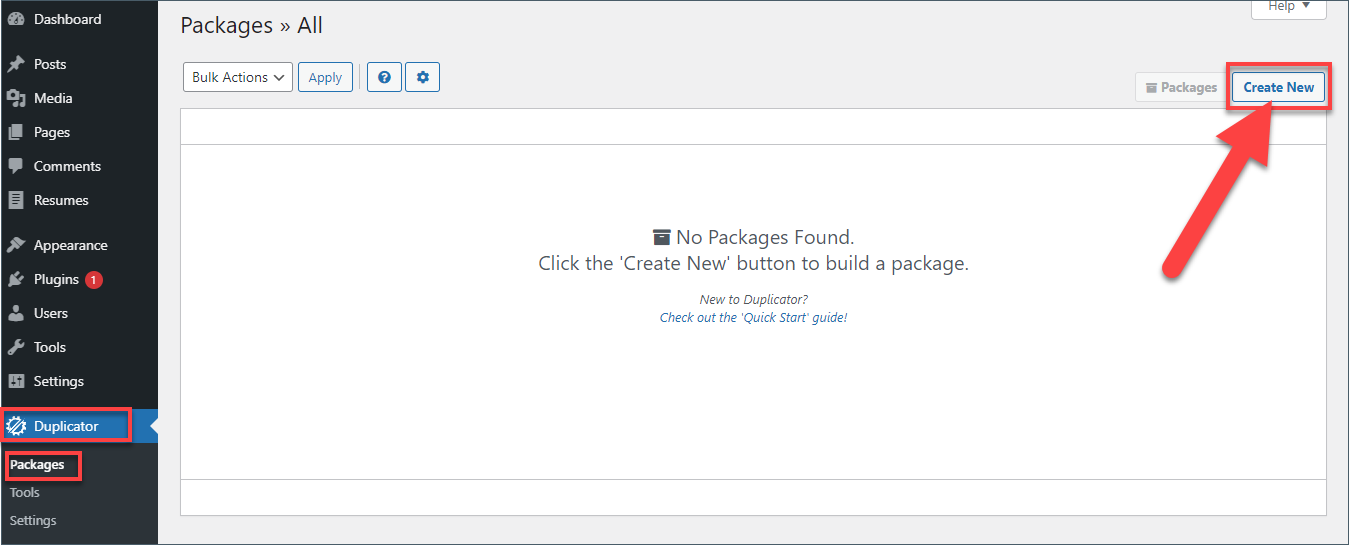
After installation don’t forget to activate the plugin. Afterward, navigate to Duplicator -> packages from your admin area. Hit the create new button.
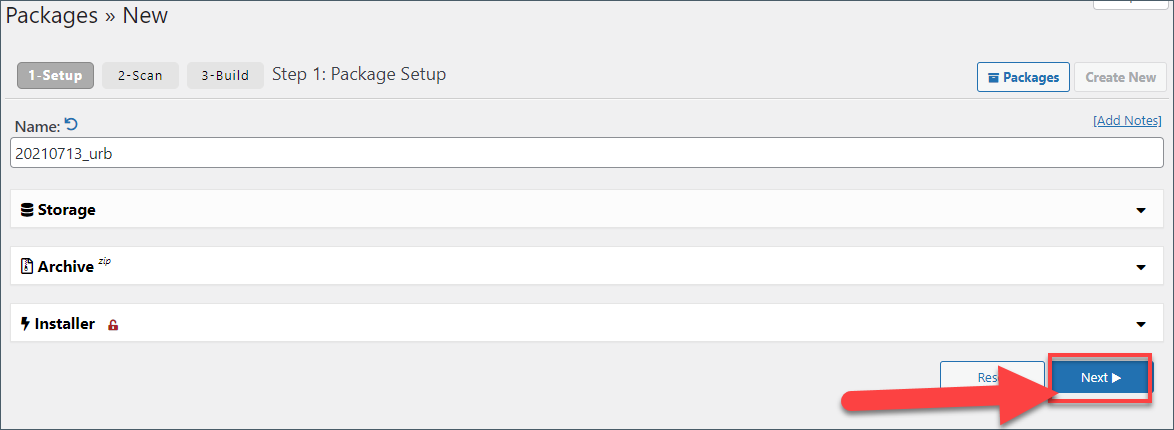
Write the file name then hit the Next button.
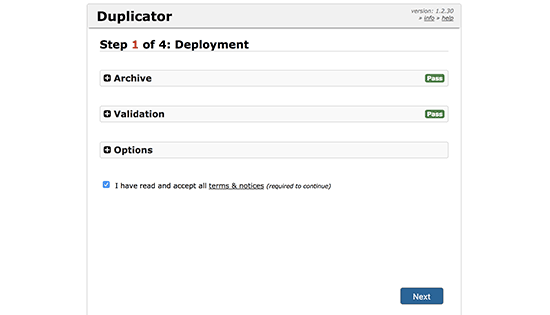
Now scanning will start and it will show you the results. Check the result, if you think everything is good then place a tick mark on ‘Yes, Continue with the build process!’ and click on the Build button.
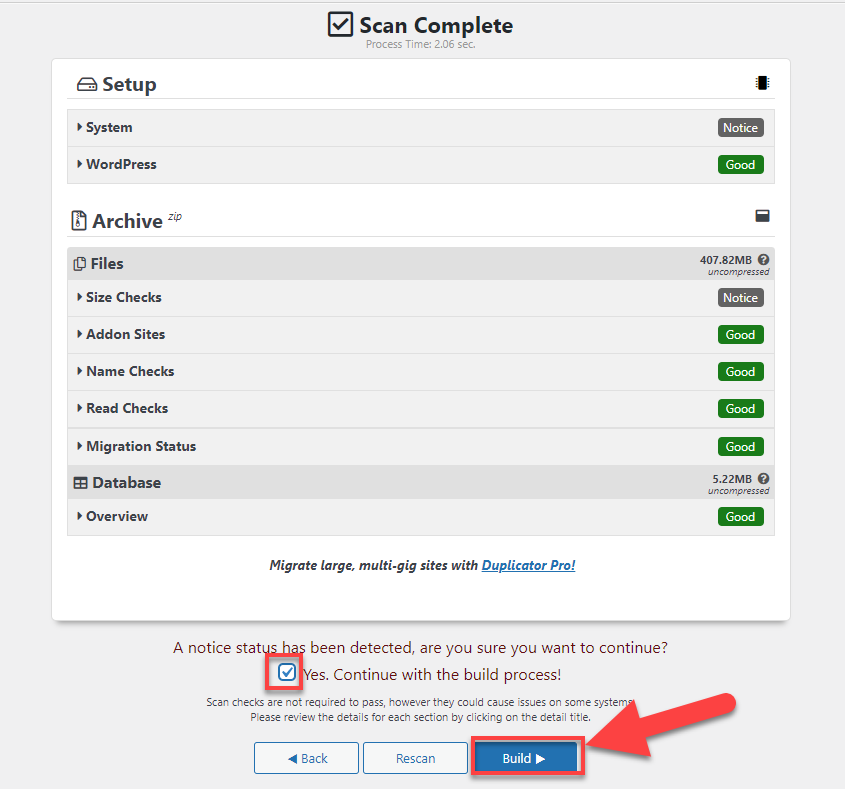
This process may take several minutes to complete. Leave the tab as it is but don’t close it. Once the process finishes, you will find the options for downloading Installer and the archive package.
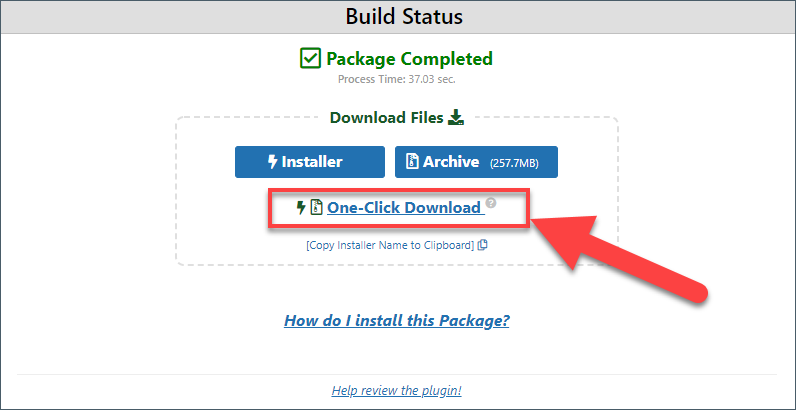
Next, download the file by clicking on the One-click download button.
Import Your Website To New Host
After downloading the installer and archive files, now you have to upload them to your new host. To do this connect to your new web host using FTP. You can use Filezilla or any popular FTP client service.
To connect to your FTP client you need to enter your website’s domain name as host. As the domain name is still pointing to your old host, you might have to connect by entering your server’s hostname or IP address. If you don’t know this information, you can find it out from your new hosting accounts cPanel dashboard.
If you don’t find this information, as for support at your new hosting company and they will help you.
By using the FTP client, upload both installer.php and your archive.zip file to the root directory of your website.
Generally the root directory is in /username/public_html/ folder.
If you are not sure ask your hosting company.
Make sure your root directory is empty. Some web companies automatically install WordPress when you complete the signup process. If you have anything in your root directory, make sure you delete everything.
When you are done deleting everything, upload the installer.php and archive.zip file to the root directory.
Change The Hosts File
After uploading both files to your new host, you need to access the installer.php file from a browser.
Generally, you can access this file with a URL like this
https://www.abcd.com/installer.php
This URL will take you to you the old web host, and you will get a 404 error as the domain name is still pointing to your old web host.
If you change your domain nameservers and point it to your new hosting company, your visitors will see a broken website as you migrate it.
So, let’s access your new site temporarily on your computer without affecting your previous site.
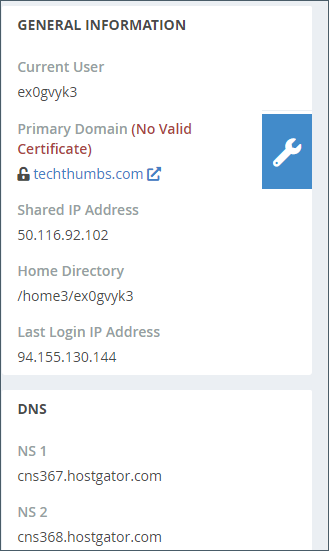
First, find your IP address of your new host login to cPanel and check on the right side.

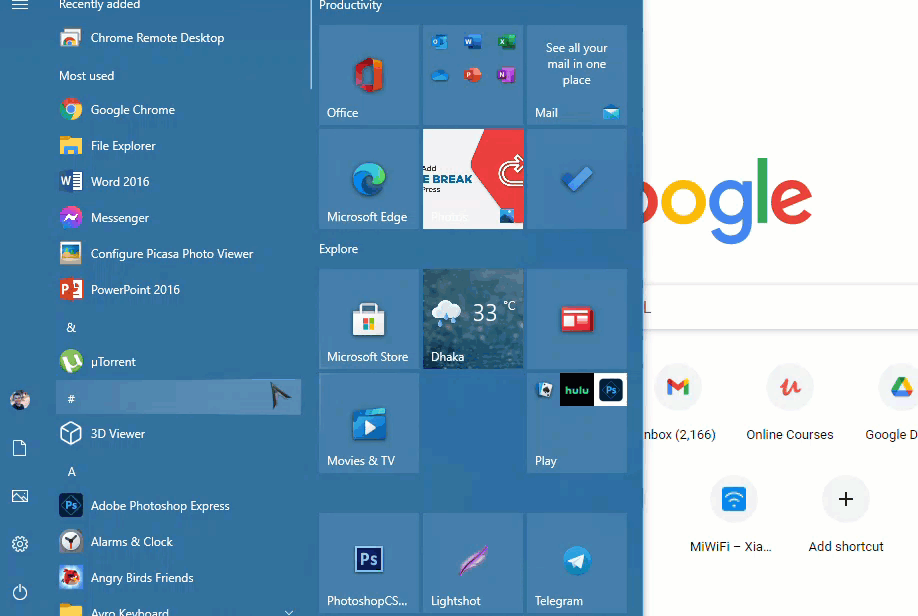
Next, search notepad and run it as an administrator in Windows. From the file, menu navigate to
C:\Windows\System32\drivers\etc folder and select hosts file.
If you are using Mac then open the Terminal app and enter this command
sudo nano /private/etc/hosts
Now at the very bottom of the hosts file enter your IP address and domain name like this
192.168.1.22 www.example.com
Make sure you place the IP that you copied from Cpanel and your website address with example.com.
When you are done don’t forget to save the file.
Create MySQL database on Your New Host
Before you run the installer, you need to create a MySQL database on your hosting site. If you already have created one then you can jump to the next step.
To create a new database click on MySQL databases from your cPanel.
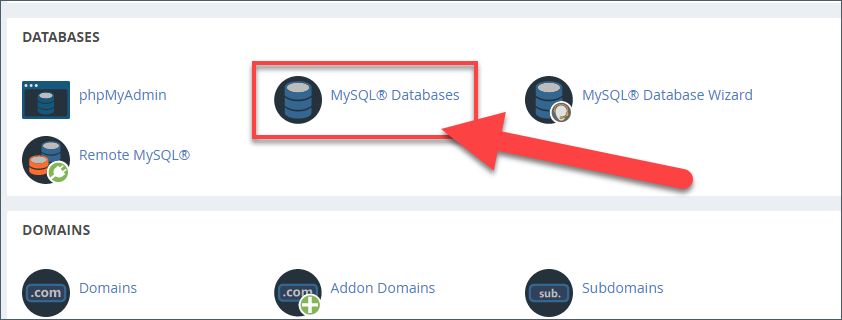
You will see a field for creating new database. Enter the name for your database and click on the ‘Create Database’ button.
A little below on the same page, you will find the option for creating new user. Create one by providing user name and password.
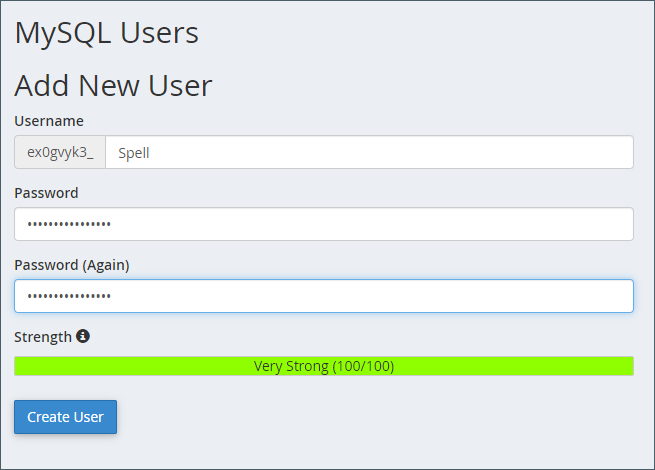
Your database is now ready. Make sure you remember the database name, username, and password. You are going to need this information in the next step.
Complete The Migration Process
Now run the installer, by navigating to
https://www.abcd.com/installer.php
Replace the above address with your domain name.
The installer will run a few tests then you have to click on the Next button. Now you will be asked to provide the database name, username, and password. Then click on the Next button.
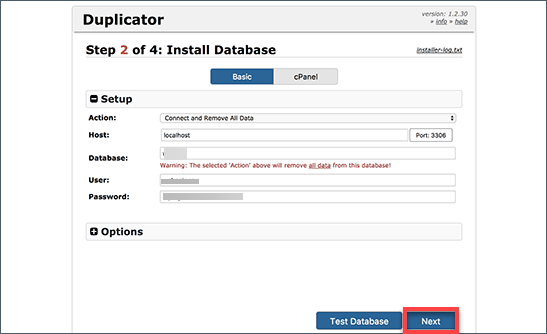
Duplicator will now import your WordPress database from your archive.zip into your new database.
Now it will ask you to update the site URL. since you are not changing domain names, you don’t need to change anything. Then click on the Next button and log in to your website.
Update Domain Name Server
Now it’s time to update the domain name server. According to your hosting provider domain, name server setting can be anywhere in your Cpanel settings.
Navigate to your domain’s settings and click on manage. Then change the nameserver and save changes.
It will take 4-48 hours for to changes take effect. To stay on the safe side, it is recommended to wait to cancel your old hosting account until 7 days after your migration.
Final Words
I hope now you know how to move website to new host. If you have any questions or stuck anywhere while move website to new host, you can ask for my help. I will be happy to help you move website to new If you liked the post, please share this post with your friends.