
CloudFlare is one of the most popular CDN(content delivery network) and DNS management services. Setup CloudFlare DNS may not be easy for beginners. If you do wrong configuration, your website may stay down for hours or even days. Therefore it is a must to setup CloudFlare DNS for your Domain Name very carefully.
In this post, I have shown the whole process with full details. Check below, later on configure or setup Cloudflare DNS for your Domain Name by yourself. Let’s begin then.
Setup CloudFlare DNS
Get Your CloudFlare DNS Settings
To setup CloudFlare DNS, at first login to CloudFlare and add your website via Manage. Now select Domains from the left menu and click on the CloudFlare tab. Click on the plus [+] button and expand the CloudFlare dashboard.

Now select DNS Settings from the bottom right corner and view your settings.
A window will pop up and show you the specific changes that you have to make for your website.

Now you need to specifically
- Add a .htaccess redirect so that you can ensure all traffic to your site uses the “www” subdomain.
- Add a CNAME record for the subdomain “cf-landing.yourdomainname.com”.
- And change your CNAME record for the “www” subdomain to point to “www.yourdomain.com.cdn.cloudflare.net”.
Redirect Traffic to Your ‘www’ Subdomain
To setup CloudFlare DNS now you need cPanel access for setting up the redirect. If you don’t have cPanel access then, you have to set up redirect manually.
For setting up redirect, log in to your site’s cPanel and click on the Redirects icon.

In this page
- Set the Type of redirect to “Permanent (301)”.
- Choose your domain name from the http://dropdown menu.
- In the / field, write nothing. Leave it blank.
- Write the full URL to which you want to redirect traffic in the Redirects to the field. As I have shown below, it must contain both the “www” subdomain and the protocol. For example, if I want to redirect traffic from “http://example.com” to “http:www.example.com”, so I have put “example.com’ in the http:// field and “htttp://www.example.com” in the Redirects to the field.

Once done, then click on the Add button at the very bottom to put the redirect in place and move on to the next step.
Add CloudFlare Landing Page Record
Now it’s time to add the CloudFlare Landing page record to setup CloudFlare DNS.
From your manage dashboard, click on Domains from the left menu, and then click on the DNS tab to checklist of your domains.
Then click on the [+] to the left of your domain name to display its past DNS records.
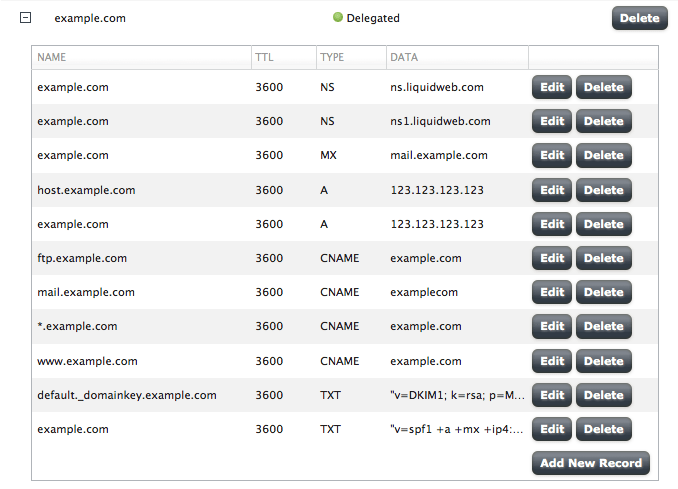
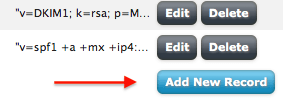
Now click the Add New Record button in the right bottom corner of the screen.
At here, I want to add a CNAME record for the CloudFlare landing subdomain, therefore enter “cf-landing” in the NAME field, select “CNAME” for the TYPE field, and don’t forget to set the TTL field to a reasonable value. Time To Live or TTL, tells DNS servers that how frequently to look for changes in the record. At here value is listed in seconds and I have given the value 3600 which means one hour. Once done, click on the green tick button on the right side to add the record.

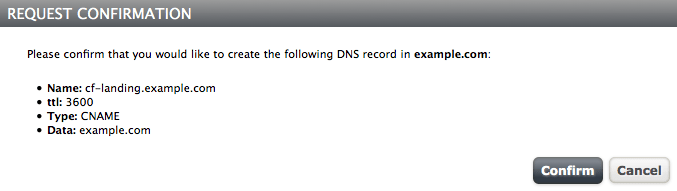
Now review the record details from the popup window and make sure they match the values provided by CloudFlare, and then click on the Confirm button to add the record.
Change The Data Field Value For Your ‘www’ Subdomain
To setup CloudFlare DNS, it’s time to change the Data Field Value for your ‘www’ subdomain.
Locate “www” subdomain entry and click the Edit button to change its values.

From the DATA field change the current value from your domain name to the value provided by CloudFlare. In this case, I am replacing “example.com” with “www.example.com.cd.cloudflare.net”. As it is an existing record DNS will abide by the current record value of TTL. Lowering the value in the point will not help you to speed up the propagation, but you might want to check that it has a reasonable value.

After you entered the correct value, click on the green tick button.
Then finally, review the values presented on the popup window, and then click the Confirm button to add the record.

Now CloudFlare will detect your DNS changes that you have made, all the web traffics will be routed through CloudFlare servers. It might take 24-48 hours for the DNS changes that you have made to propagate across the web fully. But in some cases, you might see changes take effect much faster.
Conclusion
As CloudFlare as proxy and sitting between your website and the rest of the internet, your server will by default log all visits to your site as originated from CloudFlare. Hope you got the whole process to setup CloudFlare DNS, if you didn’t, then ask me in the comment box. I will be happy to help you.
If you liked this post, please share it with your friends, and don’t forget to leave your thoughts in the comment box below.